July 26, 2010
July 17, 2010
Where I Got My Paint Colors
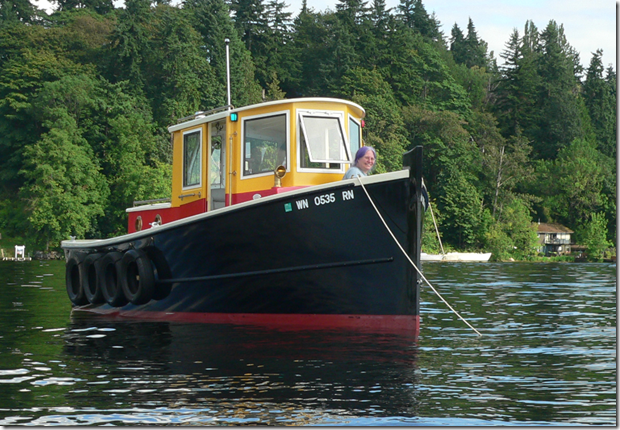
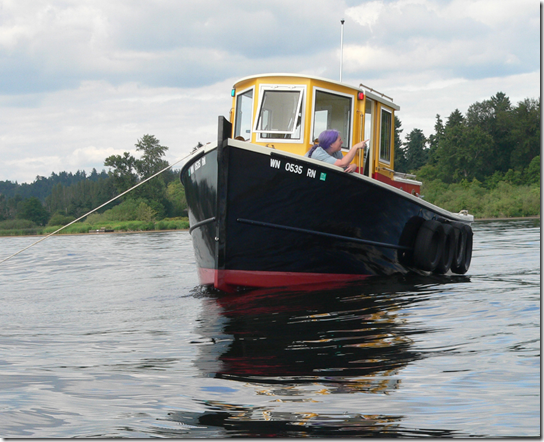
The W. O. Decker is a 1930 tug, now owned by the South Street Seaport in New York City. I would have stolen the colors verbatim, but Meryll said I couldn’t use the gray-green trim, and made me go with the cream trim instead. A good decision, as usual ![]()
If you squint, you can hardly tell them apart!
July 12, 2010
Grounding a Plastic Gas Tank
I have a permanently-mounted 25-gallon roto-molded plastic gas tank for my outboard motor. Gas sloshing in a tank (even a plastic one) can generate static electricity. Gas flowing from a fill hose into the tank can do the same. If the electricity sparks, it can ignite the gas fumes, causing an explosion. Grounding the parts should keep that from happening.
Here’s how I plan to ground the tank parts:
- Run a green, 10 or 12 gauge stranded wire from the deck fill to the fill fitting on the tank.
- Run the same type wire from the fill fitting on the tank to the outboard (somewhere) as an ‘earth-to-ground’ connection.
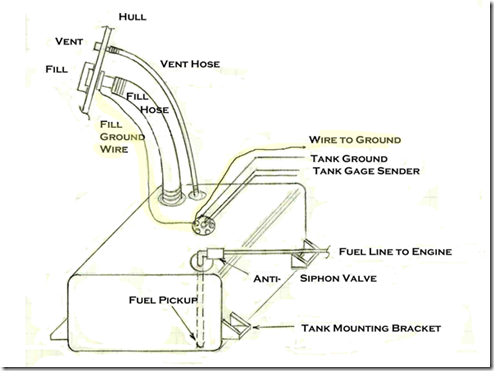
- Connect the fuel tank sender to the gas gauge as in the diagrams below.
- Unknown: connect the ‘earth-to-ground’ wire to the fuel tank sender negative wire?
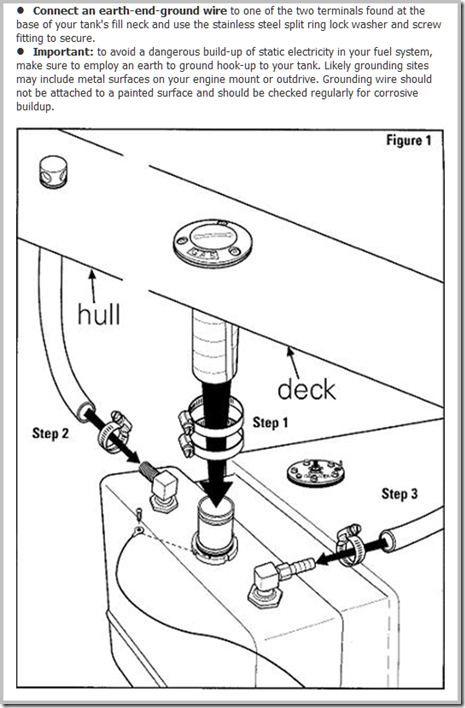
My tank is made by Moeller Marine. Here are sections from their literature. They left a lot of questions unanswered:
http://www.moellermarine.com/sites/moellermarine/files/Fuel_Tank_Installation_Instructions.pdf
My notes:
- They don’t show the deck fill fitting being grounded at all. Everyone else says this is the most important thing to ground. See the Coast Guard regulations below.
- They don’t connect this ‘earth-to-ground’ wire to the sender. The Coast Guard regulations say to bond ‘each metallic component’ together.
- Others say to ground all the parts to the battery negative, not just the sender.
- They don’t suggest a wire gauge, for grounding, or for the sender wires.
Here are the Coast Guard regulations.
USCG BOATBUILDER’S HANDBOOK
183.572 – Grounding (http://www.uscgboating.org/regulations/boatbuilder_s_handbook/fuel_standards_partp.aspx)
Each metallic component of the fuel fill system and fuel tank which is in contact with fuel must be statically grounded so that the resistance between the ground and each metallic component of the fuel fill system and fuel tank is less than 100 ohms.
Fuel flowing from the dispensing nozzle into a fuel tank is a potential source of a static electric charge which could cause a spark between the dispensing nozzle and metal component of the fuel tank fill system. To prevent such a spark from occurring, metallic components of the fuel tank fill system and metallic fuel tanks must be grounded.
Grounding or bonding may be accomplished by connecting the metallic components electrically by running a wire from one component to the next, and so forth to the boat’s ground. Grounding can usually be accomplished by a connection to the common bonding conductor or the engine negative terminal.
If the fuel tank deck fill fitting is nonmetallic, and nonconductive hose is used as a fill pipe, there is no need for grounding the fill fitting. Chrome-plated plastic fill fittings are treated the same as metallic fittings.
NOTES:
1. If a metal hose attachment fitting is used, it must be grounded.
2. Fill cap retaining chains need not be grounded.
And here are some of the most reasonable-sounding snippets on the topic I could find:
http://forums.iboats.com/showthread.php?t=277876
Here’s why it’s a good idea to connect it to the negative terminal on the battery. You would do this to create an inductor that will absorb the energy of a static discharge and thereby create a path of lower resistance. This is called a floating ground and is the most common type of grounding found in marine vessels.
http://forums.iboats.com/showthread.php?t=338520
You are putting a plastic tank in an aluminum boat. If a metal fill and metal vent are used, they need to be grounded, as well as any lengths of metal tube in the fill or vent hoses. The plastic does not need to be grounded. Grounding (according to the Coast Guard regs) should be done with marine grade 14 AWG green jacketed STRANDED wire.
http://continuouswave.com/ubb/Forum6/HTML/002280.html
On boats without a grounding plate, the chassis of the outboard motor is considered the ground to the sea. Usually the outboard motor will have some bare metal anodes in contact with the sea. Even if the motor is tilted up, usually there are anodes on the mounting bracket that are still in contact with the sea.
All metallic components of the fuel system should be bonded together with a 10-AWG wire with green insulation. The fuel system ground should be connected to either the vessel ground plate on the hull or, if the vessel does not have a grounding plate on the hull, to the battery negative terminal. It is assumed the battery negative terminal is bonded to the chassis of the outboard motor.
http://ifish.net/board/showthread.php?p=805479
If you have a fuel gauge for the tank the sending unit must be grounded or the gauge won’t work unless it is a gauge in the cap of a plastic tank that is mechanical. If this is a aluminum boat make sure to ground to the ground bus or negative terminal do not use the boat as the ground source. You probably should bond the SS filler neck to ground also use a hose clamp if you can’t bolt it somehow.
http://forums.iboats.com/showthread.php?t=2984
If you look at factory tank installations, this is what you will probably see:1. The tank is grounded itself to the battery either via a fuel gage or a separate wire.2. The deck fuel filler receptacle is grounded to the boat battery and/or the tank.
http://forum.woodenboat.com/archive/index.php/t-2226.html
The most important ground is between the metal deck fill and the fuel/tank so that there won’t be a spark between the nozzle and deck plate when fueling. All tanks, but perhaps the plastic ones more than others, tend to build a static charge as the fuel sloshes.
http://newboatbuilders.com/pages/fuel.html
Grounding (Bonding): All metallic components of the fuel system that are in contact with fuel must be electrically grounded to prevent a static discharge from causing a fire or explosion.
Edit: July 16 – updated image with new version – see comments by Ike below
This seems useful:
Installing a new fuel gauge
http://www.ehow.co.uk/how_6319703_wire-marine-fuel-tank-gauge.htmlInstalling a new fuel gauge may not seem like a cause for celebration, but if you install and wire it yourself, you’ve saved enough money to throw a couple of very good steaks on the grill. Wiring a fuel gauge is much the same as wiring any other gauge on your boat: one wire comes from the ignition to the instrument, one wire comes from the sensor to the instrument, one wire comes to the instrument light and one wire from the instrument goes to the boat’s common ground. The wires may follow a seemingly unusual path, but the system works.
Step 1 Disconnect your boat’s battery. Look at the back of the gauge. There are four male blade terminals, one for the lights (marked "L"), one for the power (marked "I"), one for the ground (marked "-") and one for the wire from the fuel tank sender (marked "S")
Step 2 Slip the female blade terminal of the stranded copper wire onto the "L" blade terminal of the fuel gauge. Remove the blade terminal for the instrument light of the instrument nearest the fuel gauge. Slip the stripped end of the stranded copper wire from the "L" terminal of the new fuel gauge into the female blade terminal for the instrument light for that existing instrument. Replace the female blade terminal on the blade terminal for the instrument light of the instrument next to the fuel gauge. This is called "daisy-chaining" the instruments.
Step 3 Daisy-chain the "I" wire of the fuel gauge to the power terminal of the instrument next to the fuel gauge. Daisy-chain the "-" wire to the ground wire–which may be also be marked "-" or "GND"–of the instrument next to the fuel gauge.
Step 4 Pull the wire from the fuel sender up through your boat’s dash. Slip the female blade connector on the wire from the fuel sender onto the "S" terminal of the fuel tank gauge. Install the newly wired fuel gauge in your boat’s dashboard.
July 10, 2010
Fourth (& Fifth) of July
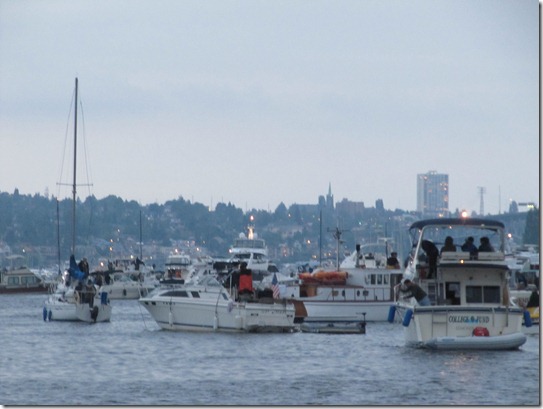
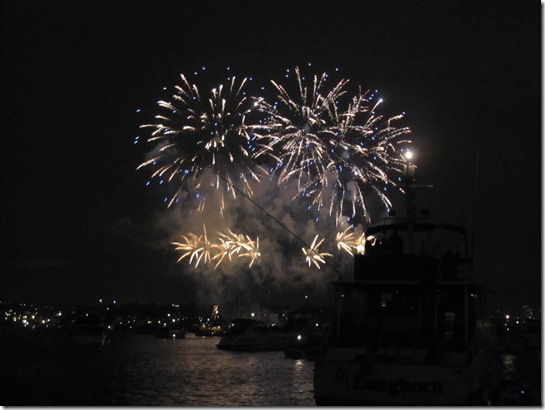
We picked up Eric & Tammy at Ivar’s Salmon House and anchored at the South end of Lake Union for the fireworks. It was just us and about 1000 other boats. The afternoon started out rainy, and then turned cool and breezy. The Coot swings back and forth at anchor, scaring us and anyone with the temerity to anchor in the vicinity. Eric and I stood guard all evening with the boat pole to keep us from having a bump in the night. When we dropped Tammy & Eric at Ivar’s afterwards I got permission from the manager to tie up at their dock for the night – so we did!
Monday was a holiday. We woke at the dock and motored to Ballard for breakfast and then through the locks to the salt water. Our first lock transit in the new boat! It went well. We went across the Sound to Kingston, about an hour from Shilshole. The sun came out and we saw some Dall’s Porpoises, which look like tiny Orca whales. We tied up at the guest dock (2 hours free), and wandered around the pretty little town. We ended up at a nice bar with a view deck. Inside the bar they were playing bingo. Pizza and beer, and then back home the same way, getting into the slip after dark. 
A million tiny herrings (?) wound through the harbor in Kingston. 
Behind the bar was one of the biggest Madrona trees we’ve ever seen. 
The view from the bar, with the downtown Seattle buildings in the distance. 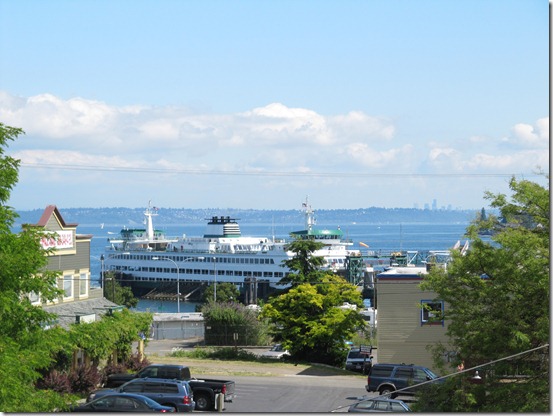
July 8, 2010
Evening Anchoring – July 3
We took the Coot out to watch the sunset and to try out the little inflatable kayak.
