Boatbuilding Blog

February 26, 2007

Starting the Stern

Filed under: Building - Before Flipping — tomlarkin @ 5:24 am

This weekend I started working on the stern. One of the most unique features of this boat is the round stern. This picture shows the two vertical pieces and the 2 hemispherical horizontal ones. The horizontal parts are not finished – I’m in the process of laminating them three layers thick each, or 2 1/4 inches thick. They will be the main structural components of the stern, with just 1/2 or 3/4 inches of hull wrapped around them.

Forms mocked into place, before laminating. Finished forms will each be 2 1/4 inches thick.

Laminating the stern forms.

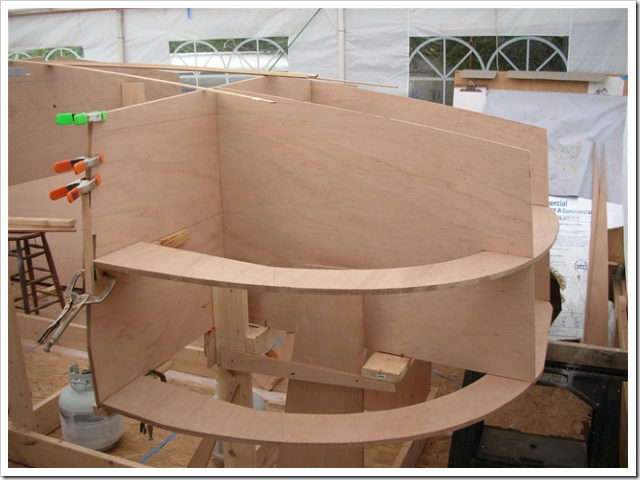
Once this step is done I’ll be ready to put up the two forward buklheads and put the skin on the boat. Then comes the scary part of wrapping the layers of 1/4 inch plywood around the stern, keeping the whole thing fair. I might be able to put on the bottom panels next weekend.

Yesterday I spent a few hours making the bulkheads perfectly square, vertical, and in the correct alignment with each other. I used the laser level for most of this and it worked well. When I was done I set the level up forward of bulkhead three, with the vertical and horizontal lines shining through the holes I drilled at the intersection of the waterline and centerline. I held up a block behind the hole of station five, and saw a perfect cross of the lines on the block. I think all three bulkheads are aligned within a 32nd in both dimensions.

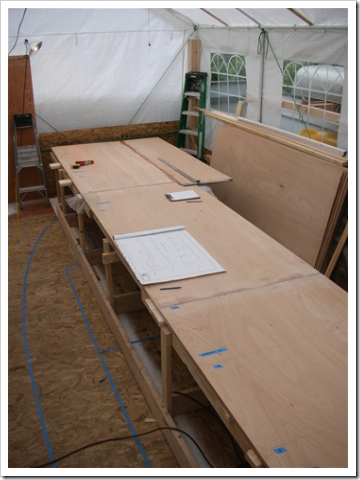
After the epoxy cured I found that I could get a fair curve by sanding with the belt sander held alternately 90 degrees and in-line with the plywood. I’ll bevel the outside of the forms after the skin panels are on, when I can fit the angle by hoding a board up to the form and the hull to see the correct angle.

February 14, 2007

Hanging the Bulkheads

Filed under: Building - Before Flipping — tomlarkin @ 9:20 am

I got all five of the bulkheads cut out, marked, and sanded. Here’s a picture showing (in order) #3, #4, and #5.  Number five is the last one, where the round stern gets laminated. It’s full-height as drawn on the plans. Notice that numbers three and four only go up to the sole level.  This saved material and allowed each of the bulkheads to be made from a single piece of plywood.

I’ve notched in for a 1×4 stringer to support the exterior sole. It gets added after turn-over.  The top of it runs right along the marked rubrail line. The lower bending-board in the picture is at the sheer line. The plywood sides will hang free to that point. I assume I’ll need to clamp on some legs to hold the plywood in the right bend. In this picture I’m trying to decide how high to place the bulkheads. Too low and I won’t be able to stand upright inside the boat, or to easily sand the sides. Too high and it will just be too hard to get to the bottom to work on it. I’m leaning toward higher rather than lower.

I drilled a 3/4 inch hole at the intersection of cenertline and waterline on all of the bulkheads. This way I can run a string or laser level through to be positive they are all in the same line. I read about this idea somewhere. It seems useful.

February 5, 2007

Bottom Panels

Filed under: Building - Before Flipping — tomlarkin @ 7:20 am

Last week I finished the side panels by filling the scarph joints and sanding everything flush. Tonight I finished the bottom panels that I glued together yesterday. The joints were better this time after the practice last week.  On both the sides and the bottom panels I marked all of the bulkhead positions on both sides of the panels. That should make it really obvious if anything is out of position as I assemble the parts. I bevelled the edges and drilled the wire tie holes in the center seam of the bottom panels as Sam discusses in his book.

This evening I started the bulkhead layouts, so I’m being forced to think about details like where the sole level is, and what I want the sole support stringer to be made of. I need to notch the bulkheads for the stringer before assembly. I’m going to cut the bulkheads right at the rubrail line marked in the plans, so the decks will end up 3/4 inch higher than that.  Also It just occured to me today that I should cut limber holes in the bottoms of the bulkheads before assembly.  At the bow I’ve tentatively decided to make the anchor locker on top of the deck so it drains onto the deck and not into the bilge. This will keep the inside of the boat a lot cleaner at the expense of raising the center of gravity somewhat. My ground tackle shouldn’t be too heavy so I think that should be OK. I’ll be able to clean the rode and anchor just by dumping a bucket of water in the locker. The water will run out of the chain locker through limber holes and out the foreward scuppers.

The left picture shows the two bottom panels. Tha dark lines are the scarphed joints. The right image is of the side panels after gluing together but before being cut out. The bow is higher than a sheet of plywood is wide so I had to extend the sheet about 10 inches. I scarphed along the whole side of a sheet of plywood and glued the exension on. This should flex evenly and be as strong as the rest of the panel.

Bottom Panels   Side Panel Showing Wide Section

I’m going to cut out all 5 bulkheads this week but only put up the aft 2 until I get the whole stern section assembled. I’ll leave the rest of the temporary raised work area up until that part is completed.  The round stern forms will take some time to build and I’ll need the work surface for cutting out the parts.  There will be very little floor space when the hull is all assembled.

The tent is working out very well. The propane and electric heaters make the place pretty comfortable even down to freezing, which it’s been every morning for the past two weeks.  I’m using fast hardener and it’s setting up overnight. I’m really glad I made the model. I spend a lot of time looking at it to visualize how the parts will all fit together and how to assemble them in the most efficient manner.