Boatbuilding Blog

June 20, 2007

Hull is Glassed

Filed under: Building - Before Flipping — tomlarkin @ 2:36 pm

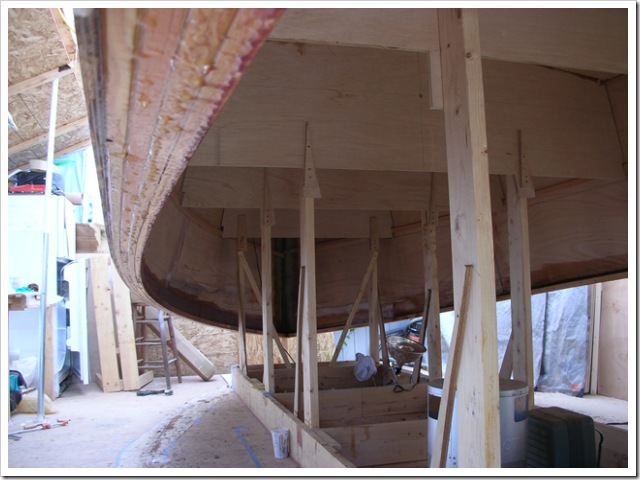
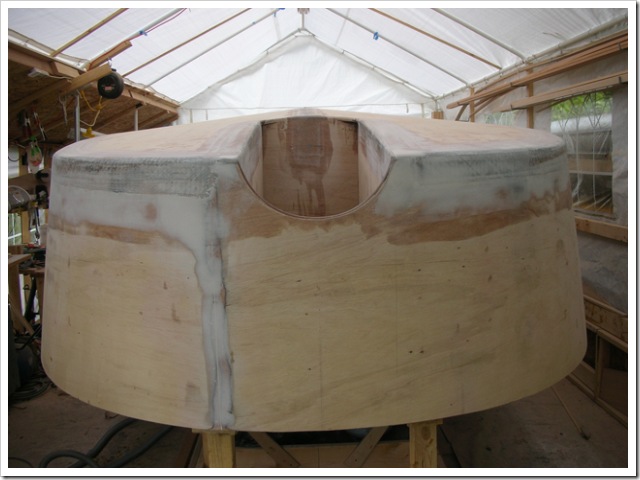
After a week of preparation I completed the glassing in a single long day of work. I finished the last filler coat just after midnight Sunday night. I’m very pleased with the results. Aside from a few bubbles and runs the surface is smooth and fair. I did the bottom in two long strips and the sides in a single long piece wrapped around from the bow.

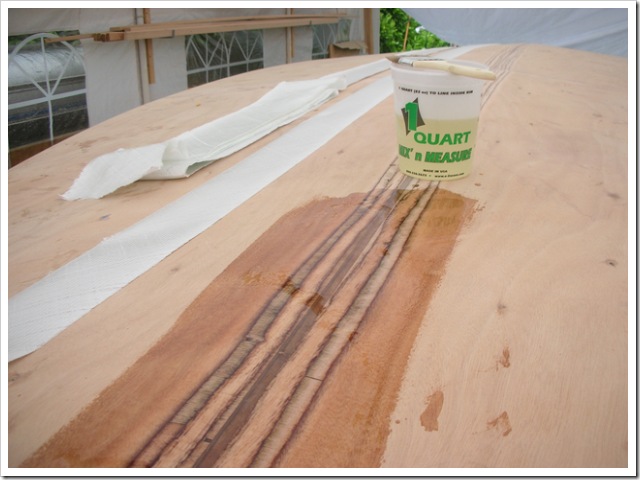
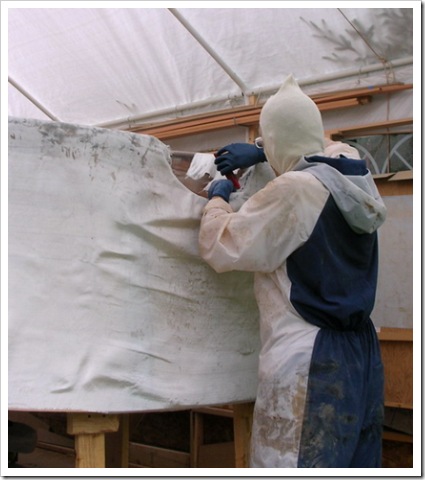
Starting the side glassing at the stern. You can see the epoxy from the bottom sheathing bleeding through the new layer. The bottom epoxy got very tacky half way through and made if very difficult to pull out the wrinkles as I applied the sides. Before I discovered the painting hood I had to cut out chunks of hair after every glassing episode. The coveralls are from an auto body shop. The front is waterproof ripstop nylon and the back is thin cotton. They last a lot longer than the Tyvek ones from the hardware store. The gloves are from the same store and are extra heavy and long to keep epoxy off my wrists.

Glassing - small

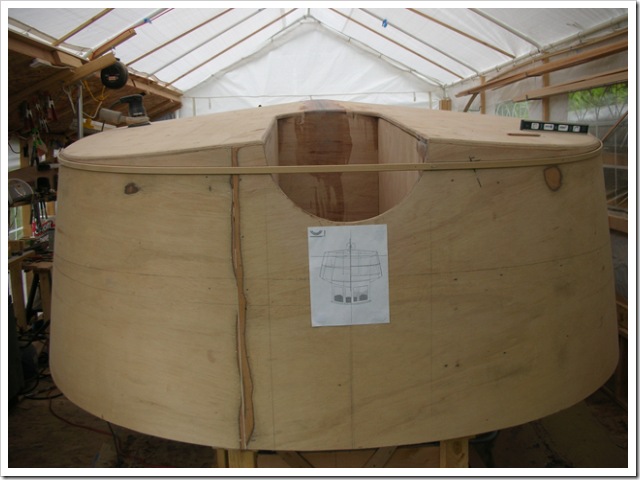
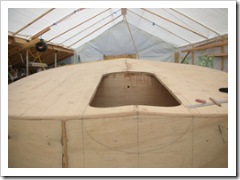
After the glass but before the first fill coat. The flat effect is from squeegying out the excess epoxy to bind the cloth tightly to the hull.

DSCN1736

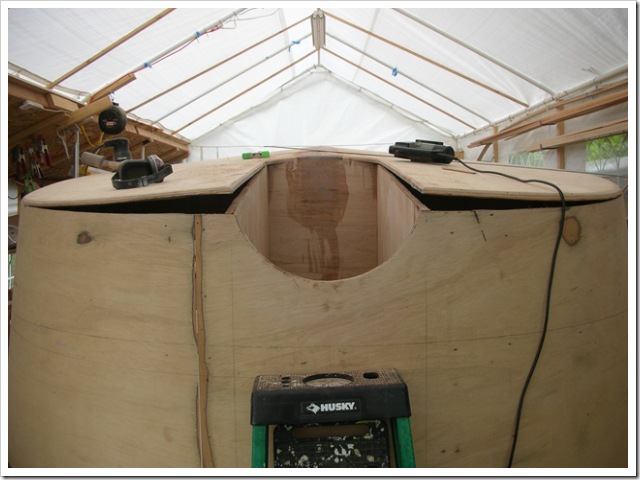
The additional coats of epoxy filled the glass weave well and left the finish pretty glossy.  Now I need to wash it down to remove the amine blush and start sanding and fairing. 

Glossy!

June 16, 2007

Miscellaneous Progress

Filed under: Building - Before Flipping — tomlarkin @ 1:41 pm

To prep for glassing the hull I had to sand a flat spot along the centerline of the bottom for the keel to lay onto:

Sanding the flat for the keel.

I laid on a couple layers of biaxial tape to strengthen the joint. I did the same for the bow, sanding a 2 inch wide flat to add the external stem and glassing it the same way.

Glassing the bottom centerline.

I added the final layer of the inside sheer and the inside longitudinals at the rubrail height that the decks will mount on.

Sheer laminations

Now I’m sanding and filling to prepare the hull for glassing. I realized that the way I was going to install the glass cloth would leave about 7 feet on either side with only one layer of cloth at the side-bottom joint so tonight I added a single layer of biax tape the joint all around. Again, more fairing, but a stronger boat. At the joint where the stern meets the hull side I did as the book suggests and made a 3/32 inch deep notch 6 inches wide and laid in 2 layers of biax. The power plane let me make both notches in less than an hour. The top of the cloth came out flush with the hull surface and I faired it in easily.

Next steps:

  • glass the hull – this weekend
  • add the center keel strips
  • add the stem – inside the hull and outside
  • add the twin skegs
  • add the rub rails
  • fair the hull
  • prime and more sanding
  • bottom paint (probably copper flakes mixed with epoxy)
  • flip! Now I’m hoping for this by the end of July or early August.

Butt Lift

Filed under: Building - Before Flipping — tomlarkin @ 1:15 pm

I made a serious mistake when I assembled the boat. The aft part of the bottom panels lay against each other in a way that made them lift in the center instead of coming together flat across the stern. The pictures will make that statement more clear. All the parts fit so well that I assumed the hull had to look like that so I glued it all together that way. I wasn’t until I laminated the stern on and sanded everything that I realized that the shape was really wrong. Instead of a smooth horizontal sweep about 4 inches above waterline the stern dropped down to the waterline in a gentle vee shape.

I spent a couple of weeks trying to rationalize that it was OK – that maybe one in a thousand would notice or care, but I couldn’t convince myself. I knew I’d see it every time I looked at the stern and it would always bother me.

So I fixed it. Actually it was pretty easy. I just cut out a wedge on either side and pulled the bottom plywood down to the new location. Since these cuts weakened the stern joint I added two layers of biaxial tape to the joint. It’s going to cost me some time to fair it all, but I’m really happy with the results. Now it looks just like the plans.

Before:

Before the butt-lift

During – the removed wedge was about 3 inches high at the inside corner:

During the operation - wedges cut out of the stern and motor well sides.

After:

After butt lift - ready for glassing.

Motor Well Planning

Filed under: Building - Before Flipping — tomlarkin @ 12:45 pm

The plans call for an inboard diesel but I’m going to use an outboard instead.  Diesel fumes – both exhaust and raw fuel – make Meryll sick. Also, removing the motor from the center of the boat adds interior space and isolates the noise and fumes away from the living quarters. Not to mention that installing a motor looks like hard work! Another factor is the prop shaft through the keel adds at least an additional foot of draft that I can avoid with an outboard. I want to take this boat in very shallow water and beach it on sandbars once in a while.  See the ‘Twin Keels’ entry for more detail.

The decision to make the motor completely inside the motor well was easy – I didn’t want to make a huge hole in the stern! I think the round stern is one of the most beautiful parts of the boat. Therefore I had to mount the motor forward enough to be able to kick up inside the cutout. The cutout dimensions I ended up with were 18 x 40 inches. I have some half-baked ideas on how to mount a kicker in-line with the motor but I won’t be able to see if they will work until the boat is right-side up.

To start the planning I mocked up a motor well on the back of my runabout in the driveway. The runabout has a 45 hp Honda four-stroke. I’m planning on using a similar (or maybe even the same) motor on the Godzilla. 

Motor well cutout planning.

Once I had minimum dimensions, I laid out various plans on the bottom of the boat in blue tape. I had to make the cutout and install the sides of the well before I glass the hull, so I couldn’t put this step off.

Stern layout marked with painters tape.

Once I had the plan I wanted I cut a huge hole in the bottom of the boat.

   Hole in the bottom. 

Then I realized the prop wash would splash inside the well so I made the hole even bigger!  I glued in the sides of the motor well and called it a day. The cross-bar is just to brace the plywood while gluing. The small hole on the centerline of the bulkhead is on the waterline. The draft at that point is about six inches.

Big hole in the bottom.